

Setting Up the Notification Screen
Contents5 sections
The Pickup screen is for your customers. The Notification screen is for your team: one glance from the bar tells them how deep the queue is, what the shift still owes, and which prep item is about to run dry.
Before you start
The display needs to be paired first. See Pairing a Screen with a QR Code, then come back here. Notification screens run at Pro locations.
Point a display at the Notification view
Open On Location > Screens > Device Settings and set the display's View to Notification, then set Display Location to the shop it belongs to.
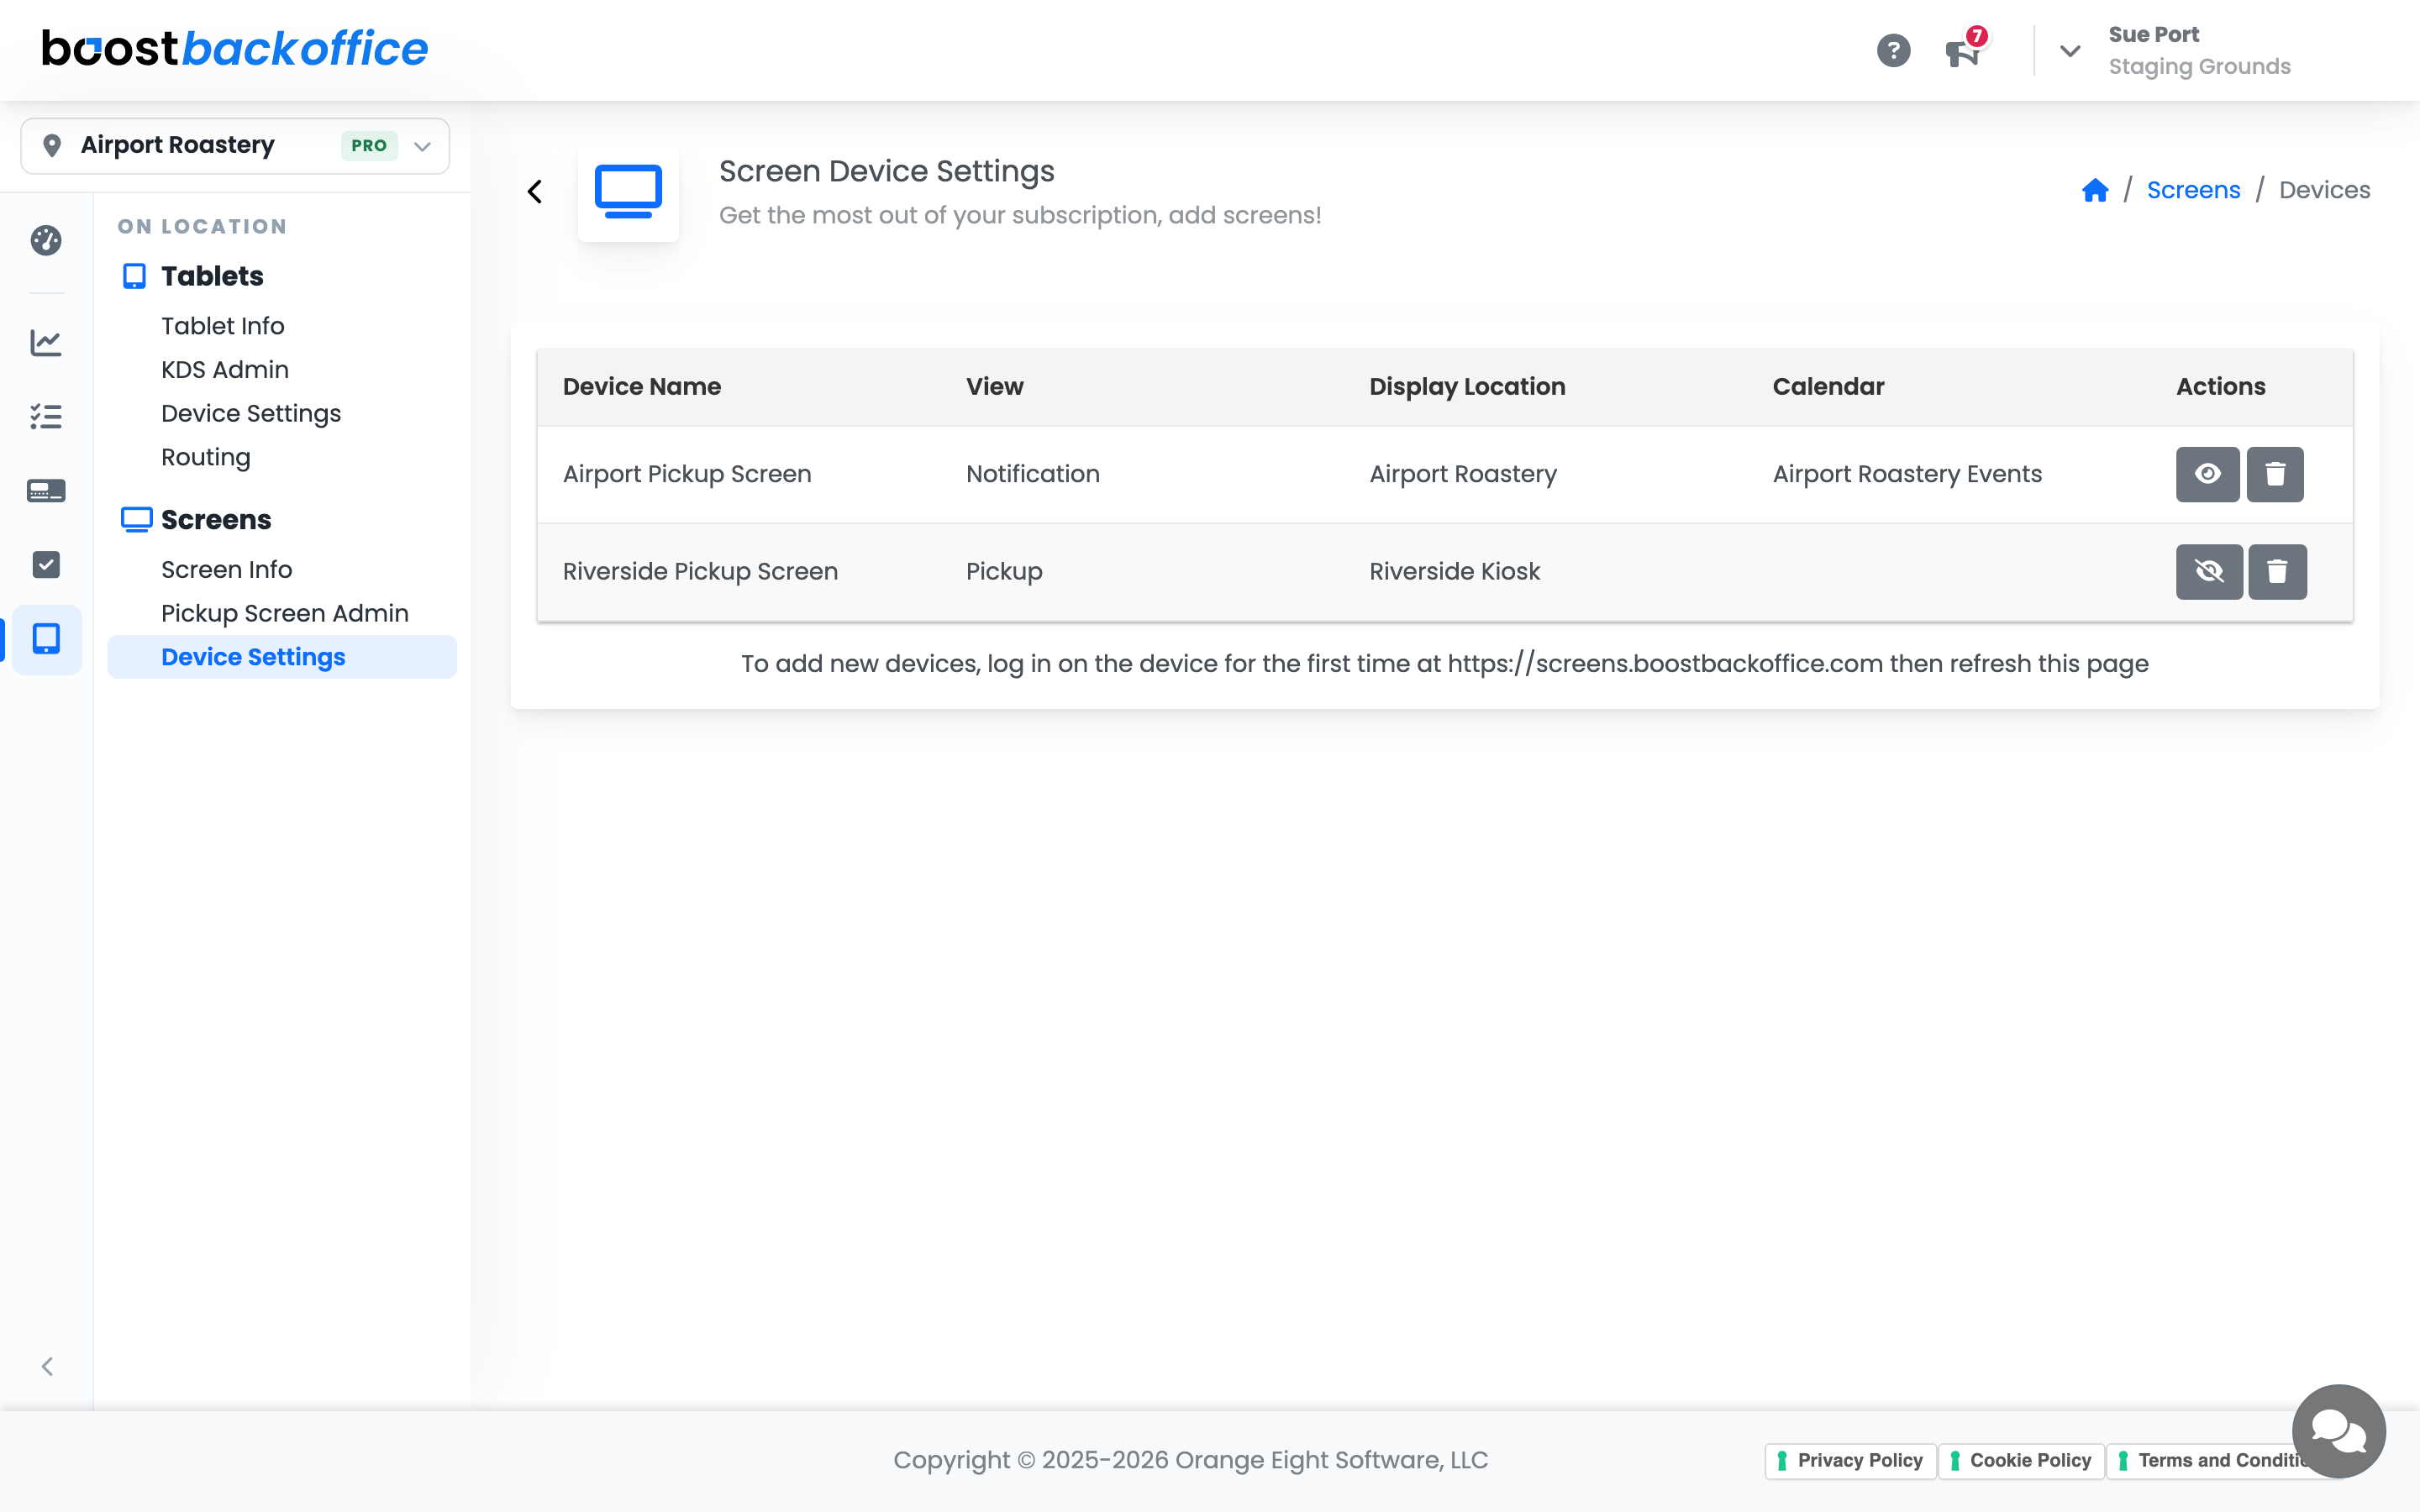
The display switches itself over within a few seconds. Notice that a Calendar column becomes relevant for this row once the view is Notification, which is covered further down.
Tip
Hang this one where staff look, not where customers do. It carries counts and checklist progress, not order names.
What the board shows
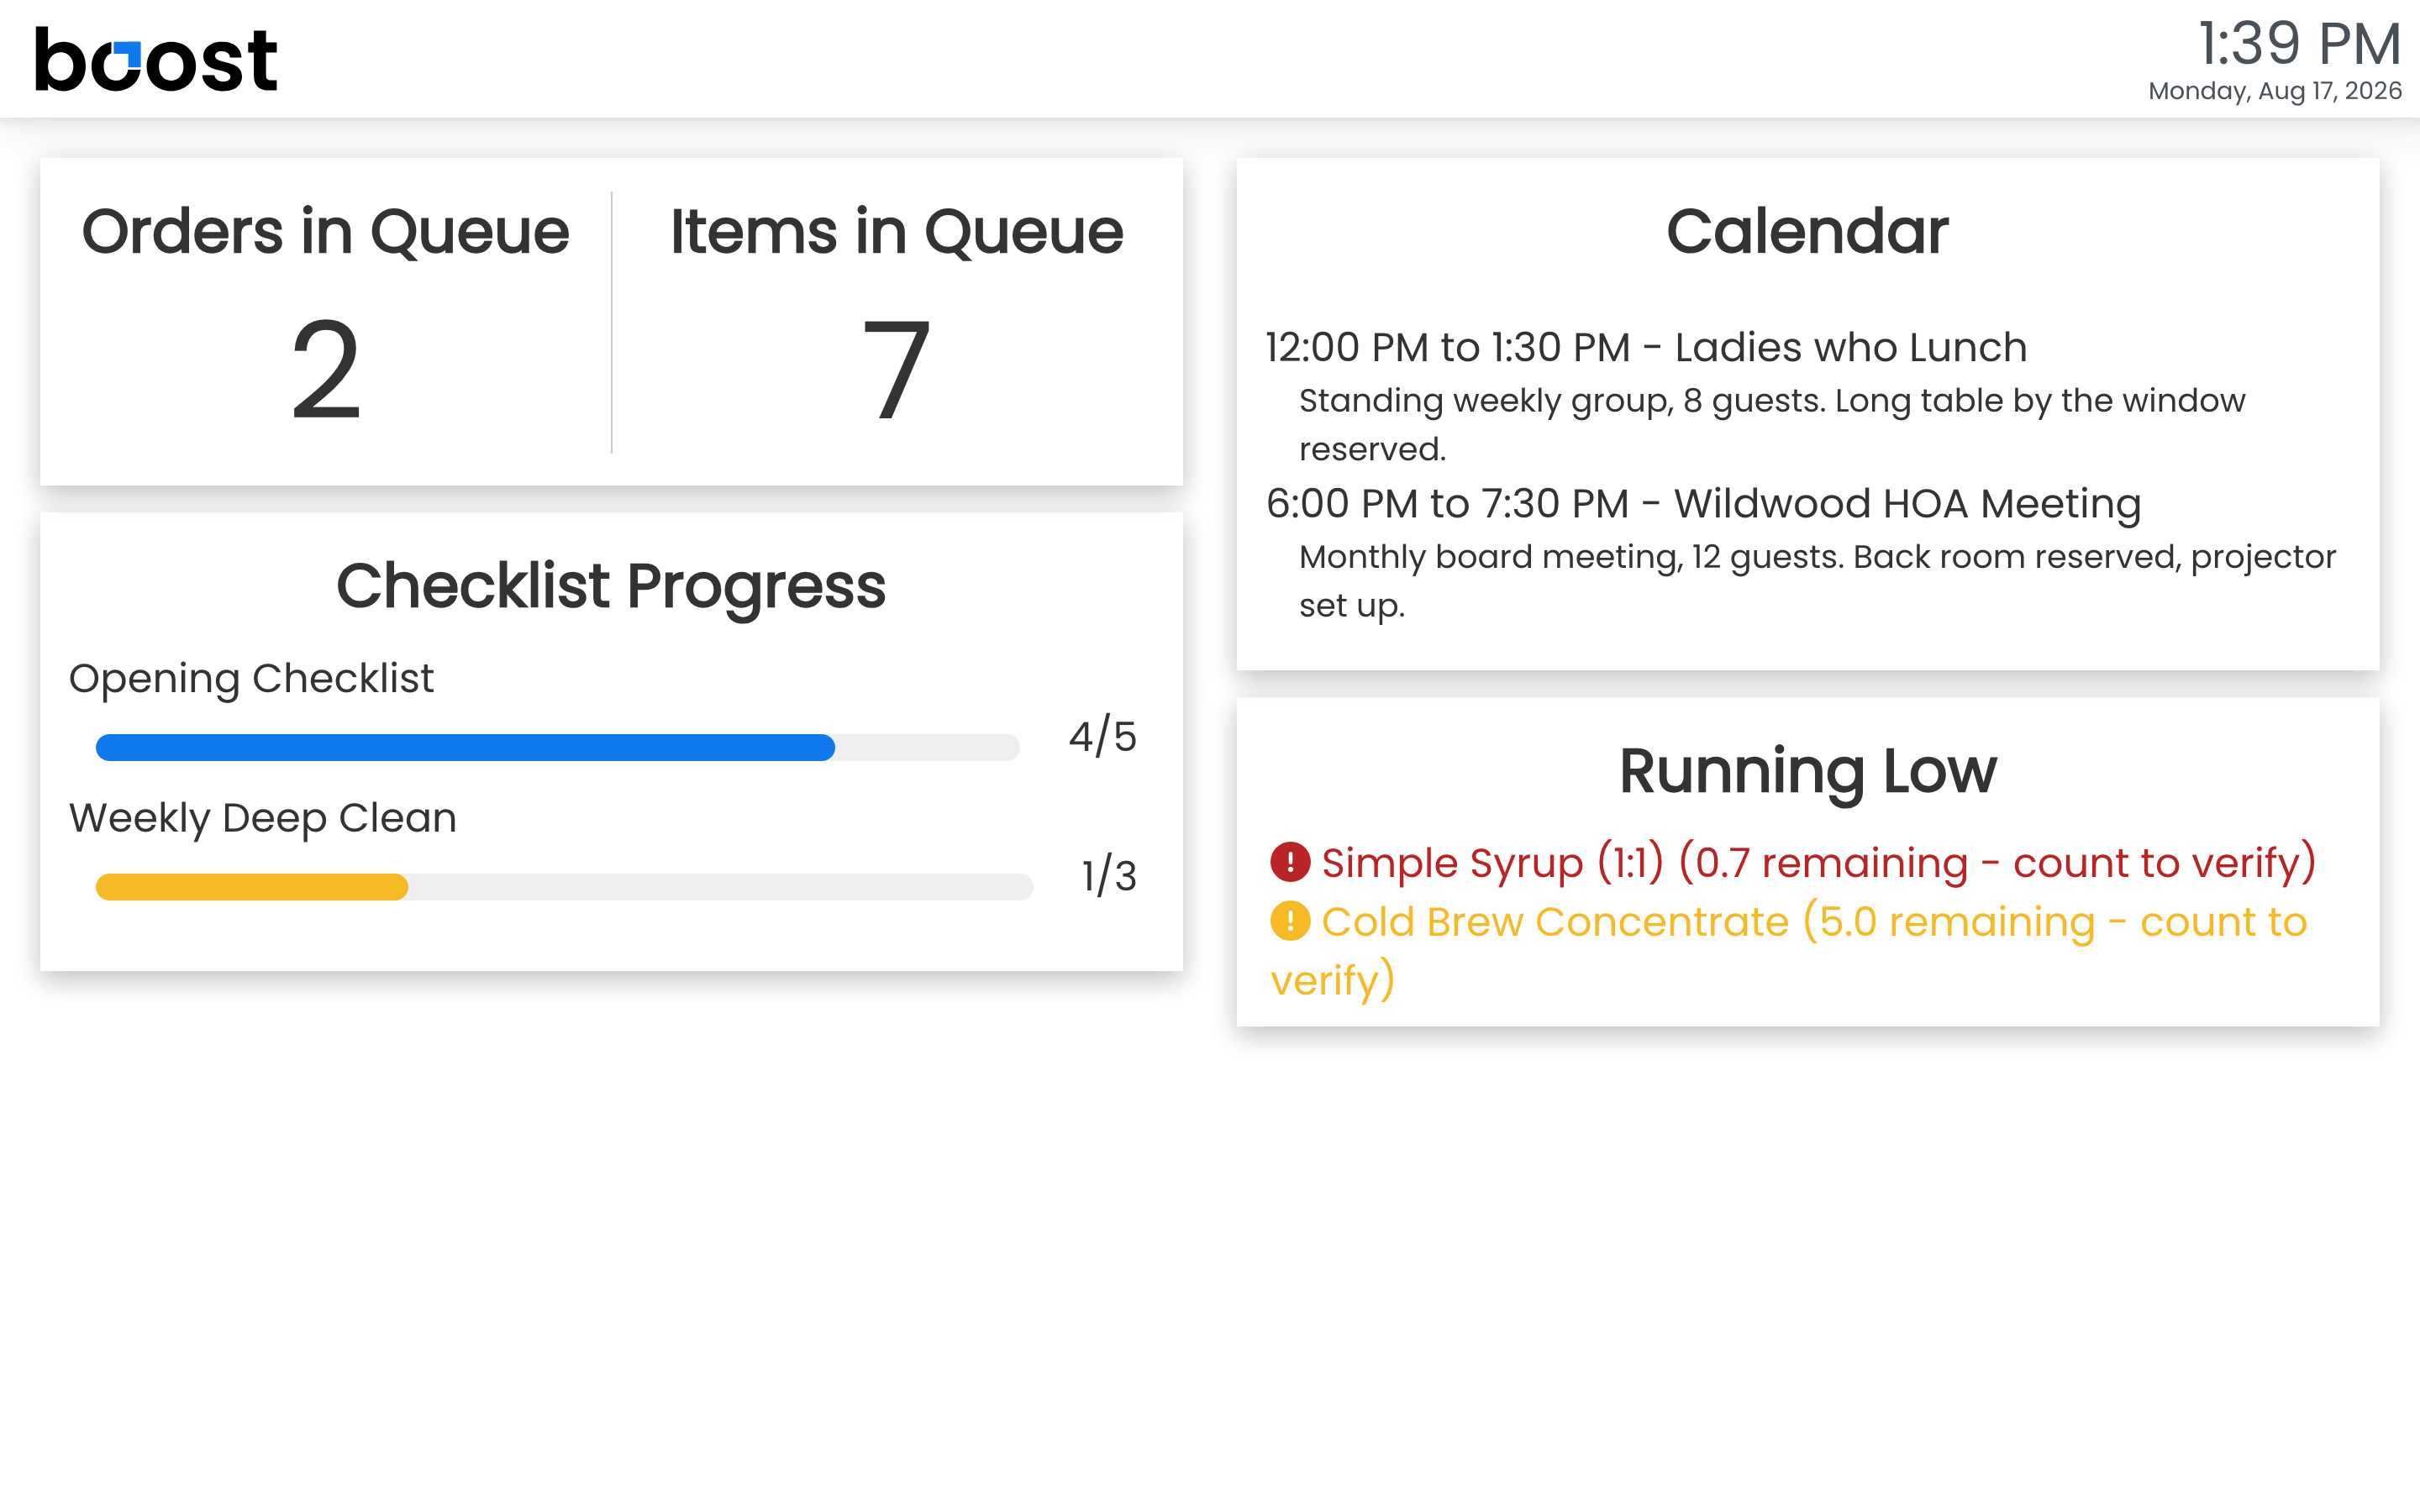
Orders in Queue and Items in Queue count what is open right now at that screen's location. Two numbers, updating live, so whoever walks in from the back knows what they are walking into.
Checklist Progress shows a bar per checklist, with the count finished out of the total. Only lists that are due now and not yet finished appear, so a completed opening list clears itself off the wall instead of nagging all day, and a closing list stays out of sight until the evening. When there is nothing outstanding the card simply says so.
Running Low is the one that saves a shift. It lists prep items that have fallen to half their par or below, in amber, then red as they get closer to empty, with the amount remaining and a nudge to count and confirm.
Calendar carries today's events for whichever calendar that display follows, with the times and whatever note you keep on the event. A lunch group with a table held for them, an HOA meeting with the back room booked: the closing team sees it without anyone having to remember to mention it.
Choose what counts as running low
Running Low is opt-in, category by category, so the wall shows the handful of things worth chasing rather than every ingredient you stock.
Open Recipes & Ingredients > Recipes > Prep Categories and use the Notification Screen toggle on each category you want watched.
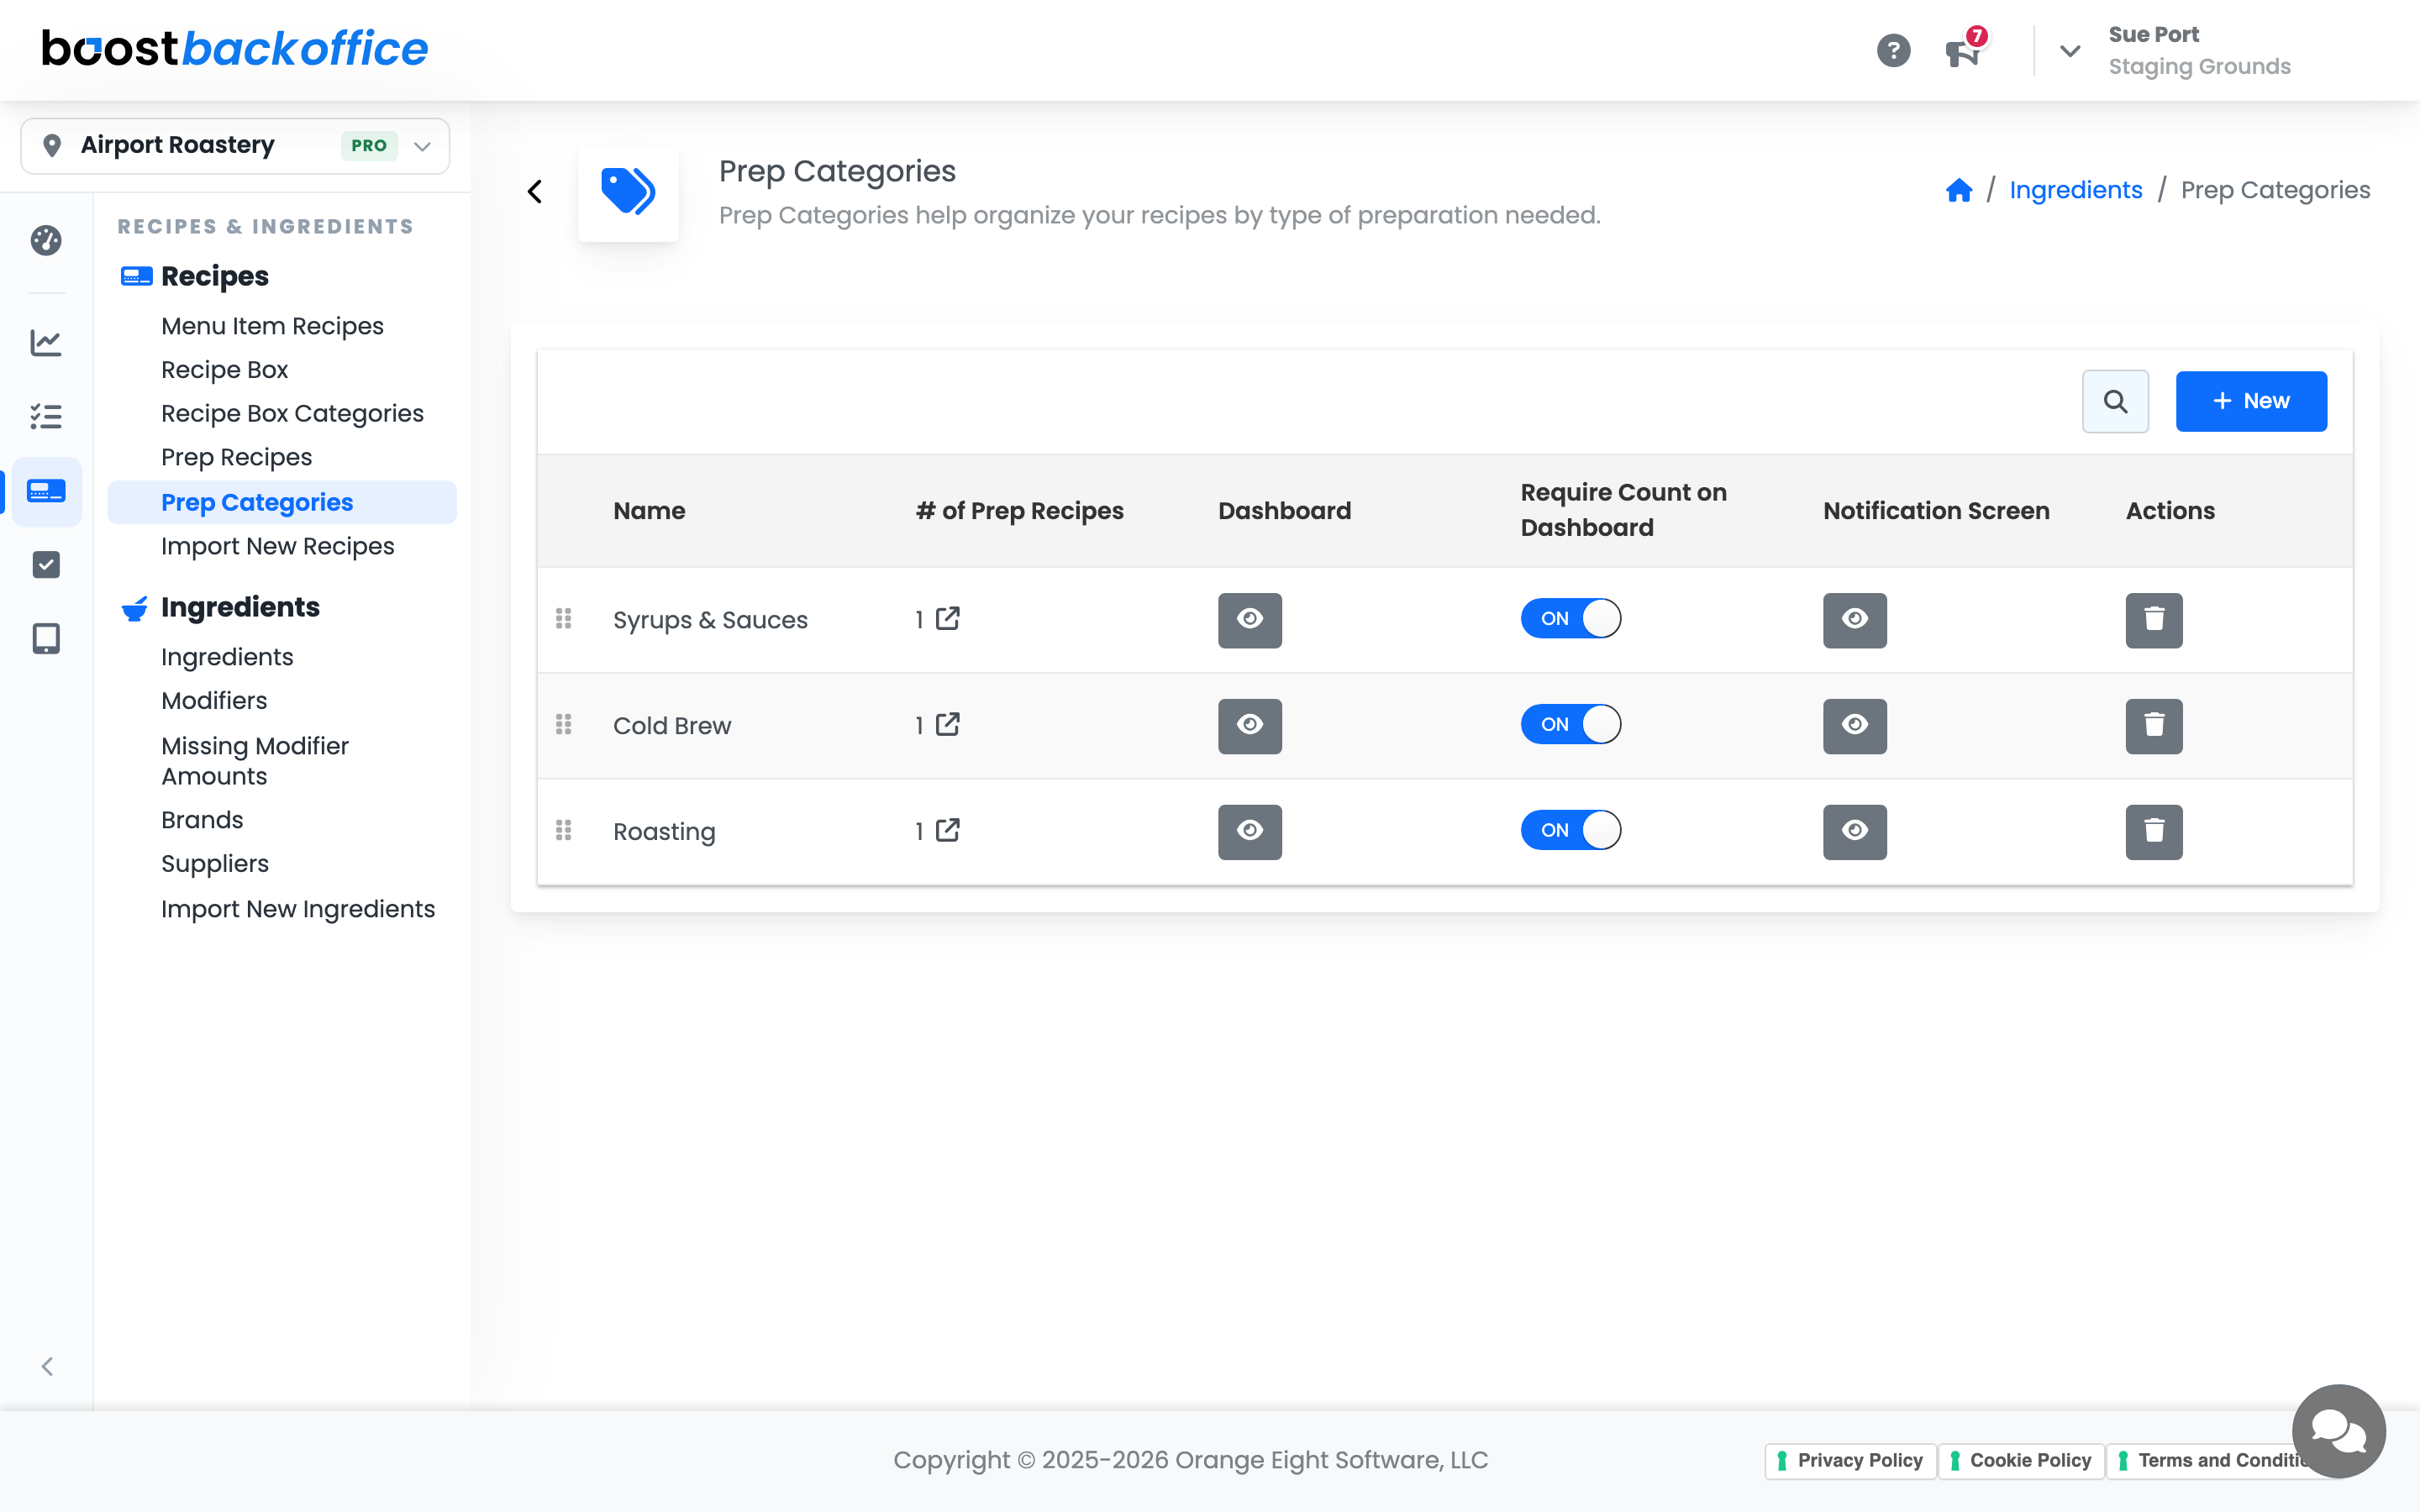
An item also needs a par set at that location. Par is what "low" is measured against, so an item without one has nothing to fall below and will not appear.
Note
The card is deliberately quiet. An item only appears once it is at half par or lower, which keeps a wall of amber from becoming background noise.
Add a calendar (optional)
The Calendar card appears once your account is connected to Google, which is a tidy way to put deliveries, maintenance visits, and standing bookings where the team will actually see them.
Pick the calendar per display, in the Calendar column on Device Settings. That column only applies to screens set to the Notification view, which is why it sits empty for a Pickup row, and picking per display means a screen in the back room can follow a different calendar than one in the office.
Accounts that are not connected to Google simply see the board without that card. Nothing else on the screen changes.
What you should see
A display that switched to the Notification view on its own, live counts for the right shop, checklist bars for whatever the shift still owes, a short Running Low list that matches the categories you flagged, and today's events if you attached a calendar.
Account Level: Pro