

Setting Up a New Account
Contents4 sections
A new account is set up in three steps: register, add your locations and choose a plan for each, then connect your point of sale. Ten minutes with the right details to hand.
Step 2: locations and plans
After registering you land on Locations & Plans. Add every shop you trade from, one at a time.
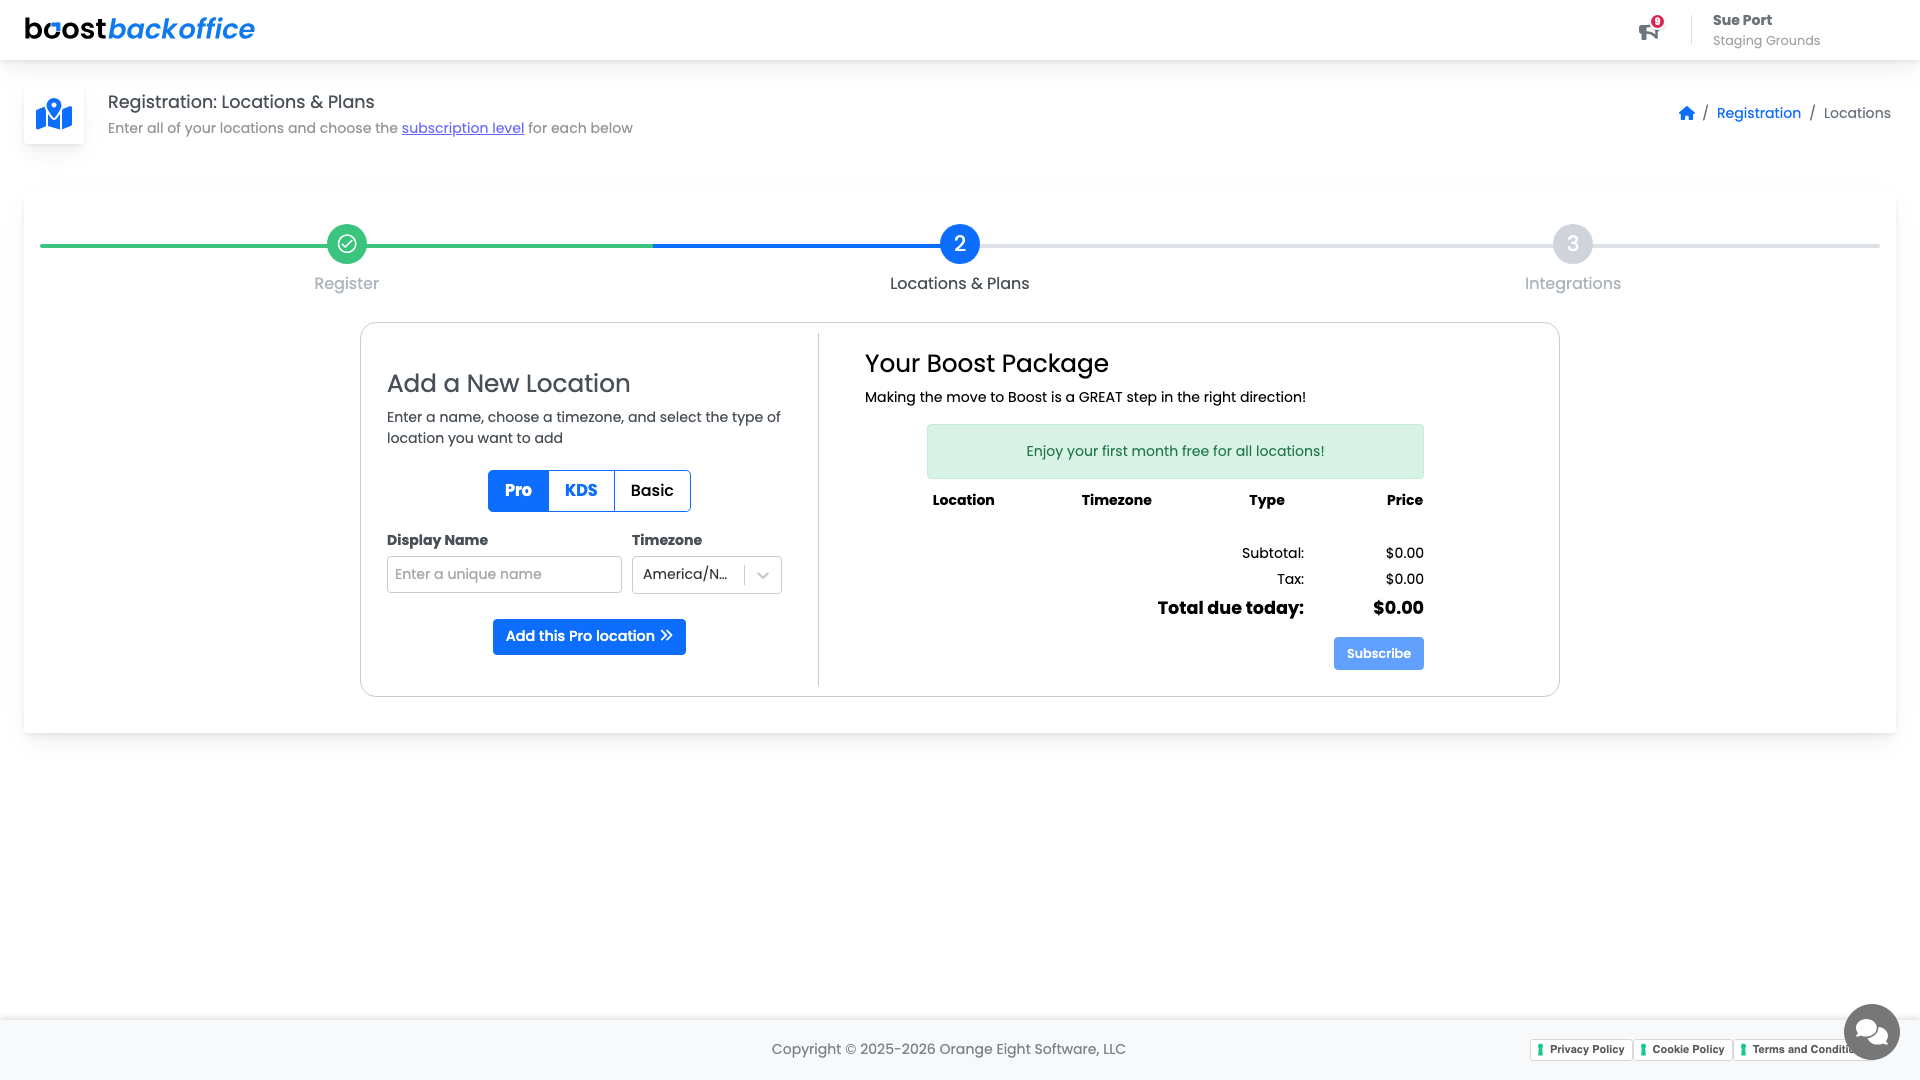
For each location you give:
- A plan: Pro, KDS, or Basic. Plans are chosen per location, so a busy roastery and a small cart do not have to run the same one.
- A Display Name, the name your team would say out loud.
- A Timezone, which decides when your trading day starts and ends in every report.
Your running total builds on the right as you add locations, and Subscribe confirms the package.
Important
Get the timezone right for each shop. It sets the boundaries of every daily figure you will read afterwards, and correcting it later makes your early reports hard to compare.
Step 3: integrations
The last step connects your point of sale, which is what starts sales flowing into Boost.
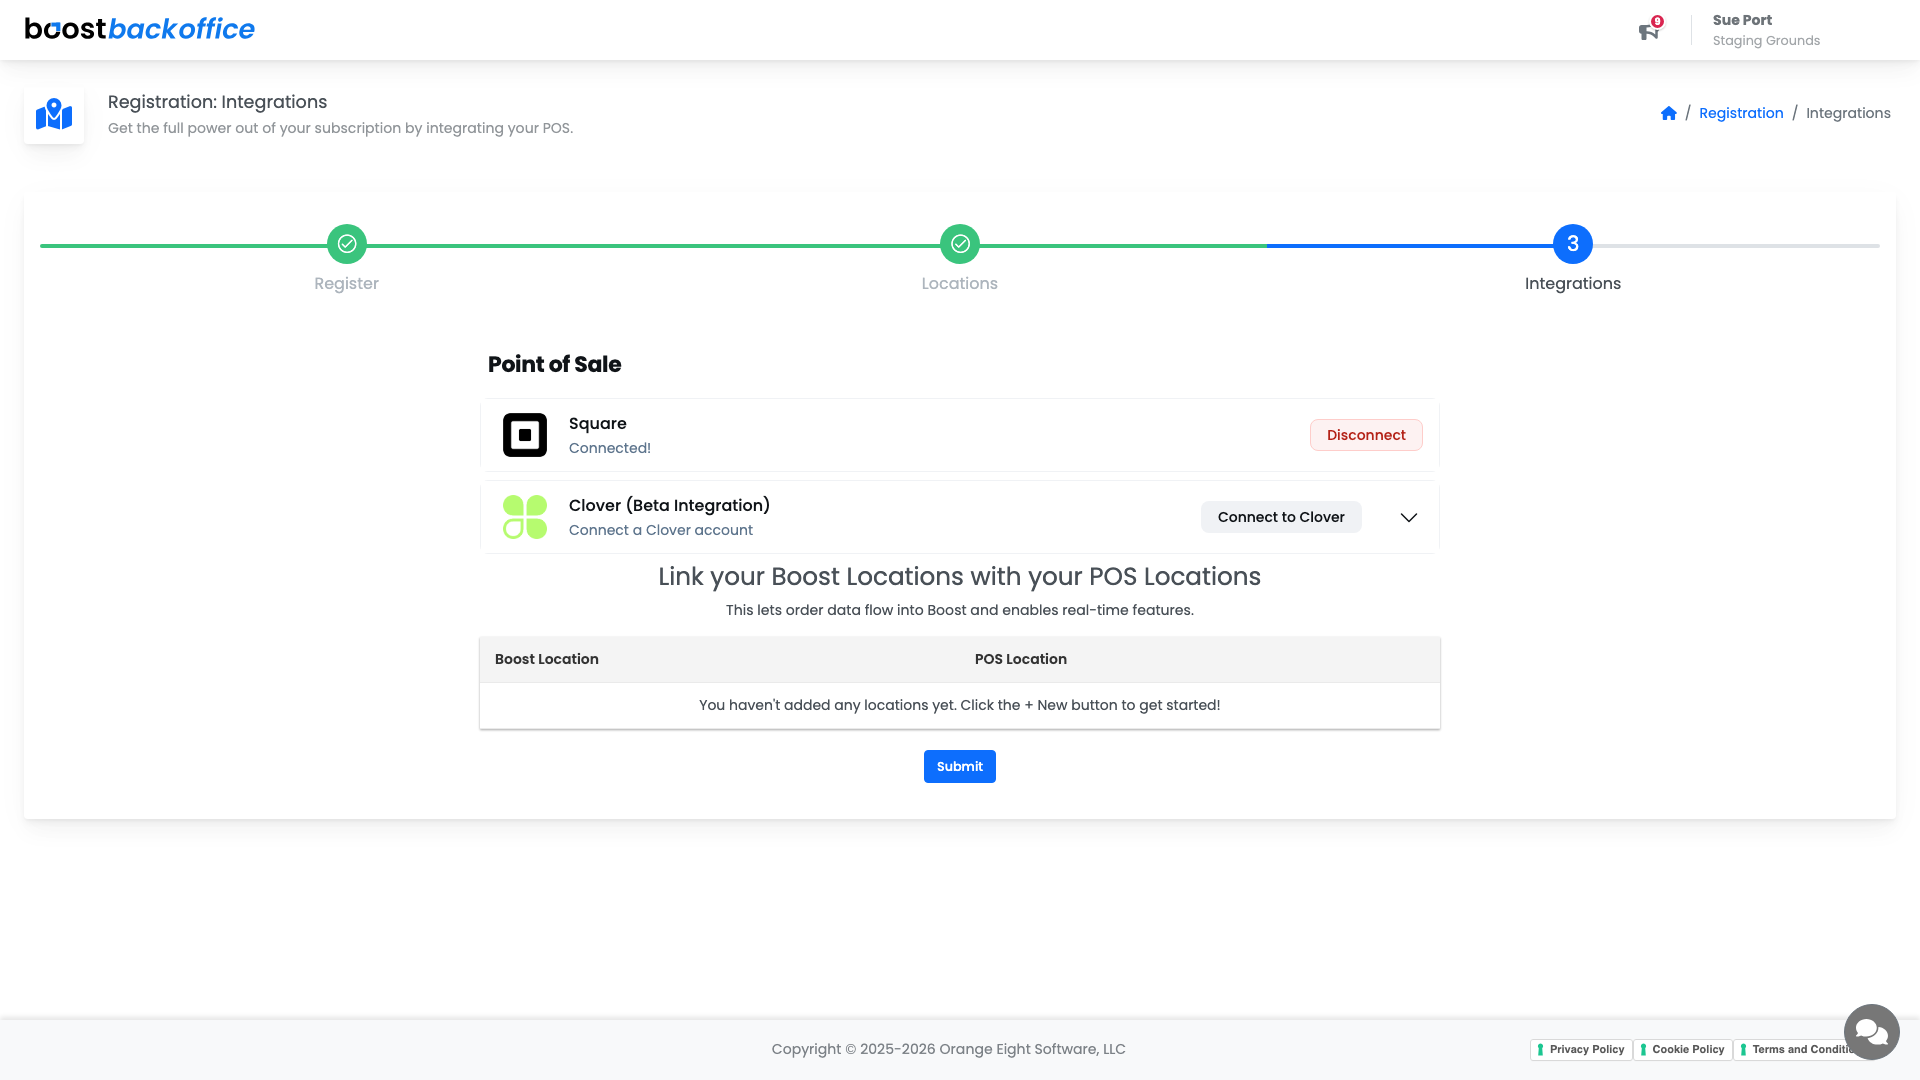
You can complete registration without connecting a POS and do it later under Account > Integrations, but very little in Boost is useful until sales are arriving.
What to do next
Registration gets the account standing up. The order that gets you to useful fastest is:
- Connect your POS and check your menu links
- Add your ingredients, or import them from a spreadsheet
- Put recipes behind your menu items
- Set up inventory zones and do a first full count
Note
Onboarding is owner or admin only, so if you were invited to somebody else's account you will not see these screens.
What you should see
Every shop you trade from on the plan that suits it, in the right timezone, with your POS connected and sales arriving.
Account Level: All